
Peter Noble sent me an email asking if I would be interested in seeing pictures of his scratchbuilt ICARUS.
He explained that his friend
Stuart Williamson had built the model for Peter, it was about 23 inches long, made of wood
and car filler, and had a detailed interior that could light up. There was even a
mummified Stewart in one of the suspended animation chambers. The escape tunnel hatch
opened, the escape hatch was removeable and the atmosphere probe extended.
I replied that I would like to include the pictures of his model on my site. These
are the pictures that Peter has sent, he will try to get more pictures soon (like
Stewart's corpse, maybe the hatches open), and will even try to get an interview with
Stuart Williamson who built the model.
Thanks, Peter. This is a very nice model with lots of incredible detail. The fact that is model is hand produced from scratch only adds to its praise.
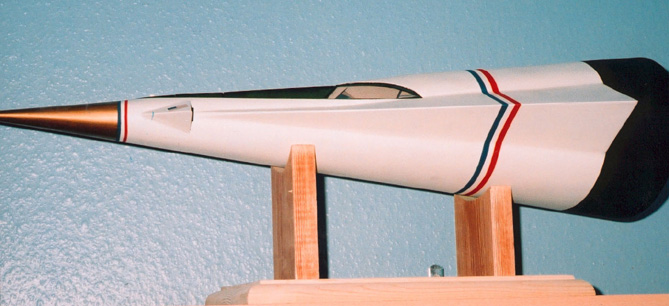
Side profile on a custom stand.
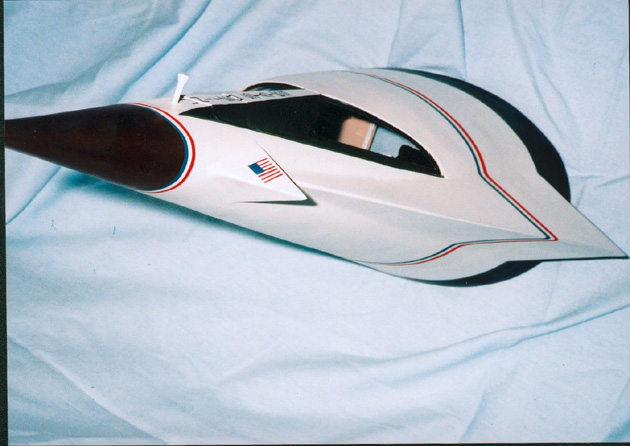
Notice the atmospheric probe extended. This scene is almost 'movie worthy', add water in place of the cloth, and you would think it was from the opening scenes. The only thing I've noticed that is not correct on this model is that there are also American flags under the forward cannards. I never thought that there were until I first saw Jim Key's art, and then checked the movie. When I asked Peter about this, he explained that the top flags are currently just painted on until he and Stuart can find scale-oriented decals, hard to do for a model nearly two feet in length and at a scale of almost 1/35! I suggested that they produce their own decals for this project (and this is good advice for any other modeler looking for custom decals especially on a project like this where scale would preclude using most spare decals you have laying around in your stores box)! American flags are easy to find in various clip art collections around the Internet (I have one for this site, a very nice one, you can have it free for the asking via email). An article on Starship Modeler once described how you could use a special type of commercially available transfer paper to produce your own decals using a simple bubble-jet printer. Search the Starship Modeler site for more information. I plan on using that technique in my own Icarus modeling projects to reproduce the ANSA logo as well as some other custom decals.
Also, I noticed that the nose cone here is black, not gold like the other shots. Peter explains that the nose cone really is gold, his camera just doesn't like very close shots, it's a rather simple point and shoot model, he says. : (
This Icarus model features engines like suggested by Jim Keys. More on that below.
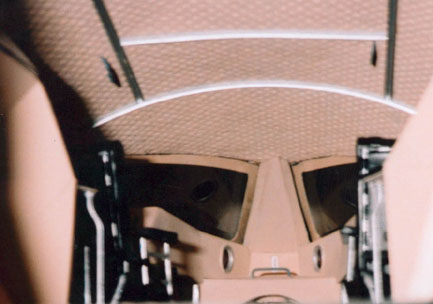
Interior looking forward.
Notice the detail in the 'egg crate' type material lining the roof!
The detail on the interior is the best I've see yet, especially the seats, which look
real!
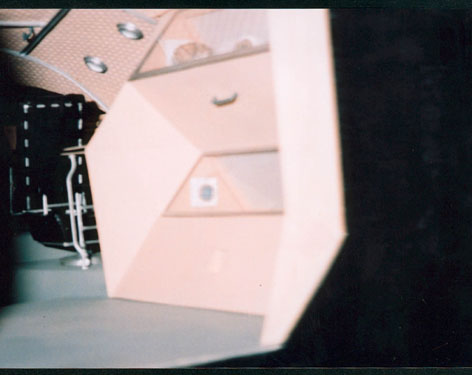
Stewart's chamber is the one on top, occupied by a miniature of her mummified corpse.
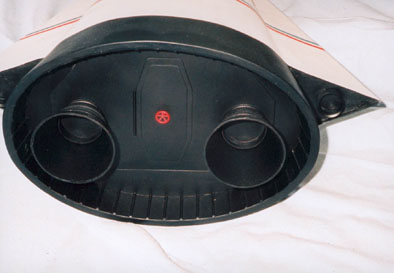
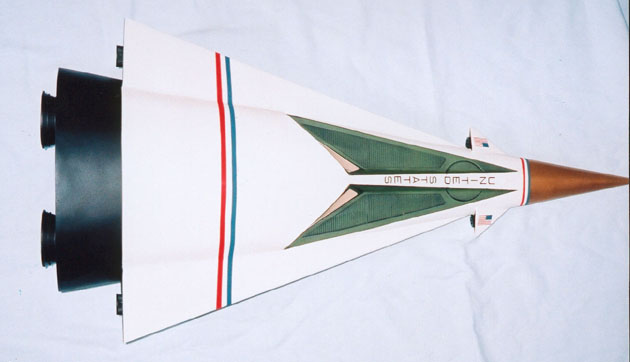
Rear detail showing the engine bells, rear hatch, and docking ring. I had never thought of the rear as being painted black, but the color choice is an interesting contrast.
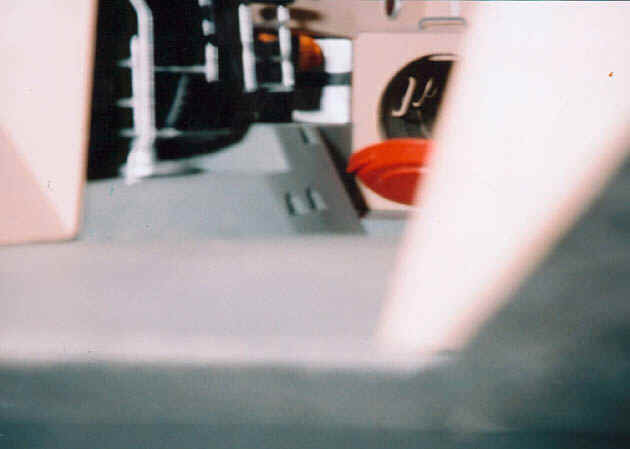
Opening forward escape hatch, notice the yellow raft is stored under the control panel as are the silver ANSA survival packs. The detail on this model is truly incredible.
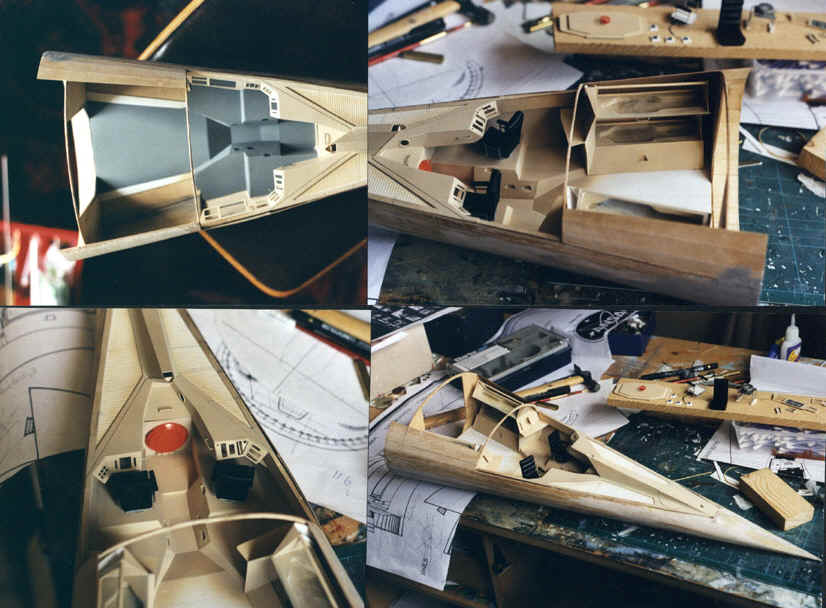
Work in progress shots from Stuart Williamson's work bench. Notice the ANSA 'blueprints' in three of the production shots. They are photocopied / enlarged versions of Jim Key's work, which gave exact specifications to the dimensions of the Icarus, ready made 'blueprints' for anyone starting from scratch to build up this model.
Peter says that Stuart is also going to work on the model of the ship from the second movie, the tail-lander hybrid using information found on this site. The scale will be smaller than this project, but it should be nonetheless incredible. I look forward to Peter's contributions on the status of his and Stuart's projects and will keep you all up to date. Here is what Stuart has to say about the project.
Building the Icarus
By Artist and Model Maker Stuart Williamson
__________________
My friend Pete asked me to
build the Icarus for him in July 1999 - at the time I knew absolutely nothing about the
craft and so Pete sent me a magazine along with plans of the Icarus and also the video of
the movie and some web addresses of sites associated with the Icarus.
After studying all this information I started by making oval frames from 1mm thick
plywood, I also made a plywood keel to connect these frames together and support the
floor. Once all these components were joined together I used very thin ply cut into long
pointed sections and started to build up the hull until it was about half way up the
sides. I then built plastic card floors over the plywood support, some of these
parts were very tricky especially the sloping sides of the cockpit area and the small
steps which were put into their sides.... there were a few failed attempts before I was
100% happy!!
It was also at this time that I constructed the forward bulkhead with its circular
hatchway to the escape hatch. The tunnel was made from empty photographic film containers
cut into sections with details added such as handles and lights - the orange escape hatch
door was cast in resin from a bottle top that I found of the right shape and its handles
were made from brass wire. I also constructed a small hinge out of brass.
The next stage was to scratch build the interior. The chairs were made from plastic card
and rod - I made one master for these which was then cast in resin. The arm
framework for each chair was made individually from thin plastic rod of the right gauge.
For the suspended animation chamber I again constructed a master from plastic card which
was cast in resin and details added later. These were then fit into the framework which
again was a complicated shape to make. All the interior details were made from
plastic card - these included the air analyser in the escape hatch, controls, life support
packs, and tables. The ceiling of the Icarus was then my next problem and was one I had
pondered over for some time! I needed something that would have the same feel as
that in the movie, and the solution I found, was padded kitchen paper - that when
airbrushed to the right colour looked perfect!
The interior completed, it was then sealed up totally so that I could finish the hull -
this was one of the longest jobs - the hull was covered with a layer of car filler which
was sanded down with various grades of sandpaper until completely smooth. This is why I
had to seal the hull, to stop the dust from getting into the interior.
Once I was completely happy with the hull, painting could begin. The hull was
airbrushed with Humbrol enamels including all the markings, but at some stage I would like
to have decals made especially for the model so that everything is as perfect as I can
make it.
______________________________
Thanks again, Peter and Stuart, for sharing this information with the rest of us.
_______________________________________________________
Questions or comments? Email ANSANAUT
